Are you looking for a way to create custom shirts without having to spend a fortune on screen printing? If so, you need to learn how to use transfer paper for shirts! Transfer paper for shirts is a great way to create custom designs that can be used on t-shirts, hats, and other clothing items. In this guide, we will teach you everything you need to know about using transfer paper for your next shirt project. Let’s get started!
How to Use Transfer Paper for Shirts: The Right Type of Ink for Transfer Paper?
Before you can start using transfer paper, you need to make sure that you have the right type of ink. Not all inks will work with transfer paper, so it is important to do your research before making a purchase. You will need to use an inkjet printer with dye-based inks for this project. Avoid using pigment-based inks, as they will not work with most transfer papers.
Types of Transfer Papers
There are two main types of transfer papers: light and dark. Light transfer paper for shirts is designed for white or light-coloured fabrics, while dark transfer paper is meant for dark-coloured fabrics. Make sure to choose the correct type of transfer paper for your project.
Light Transfer Papers
Light transfer paper is the most common type of transfer paper. This type of paper is designed for use with white or light-coloured fabrics. To use light transfer paper for shirts, simply print your design onto the paper and then iron it onto your shirt.
Dark Transfer Papers
Dark transfer paper is designed for dark-coloured fabrics. This type of paper has a special coating that helps to prevent the ink from bleeding through to the other side. To use dark transfer paper, you will need to print your design onto the wrong side of the paper. Once your design is printed, flip the paper over and iron it onto your shirt.
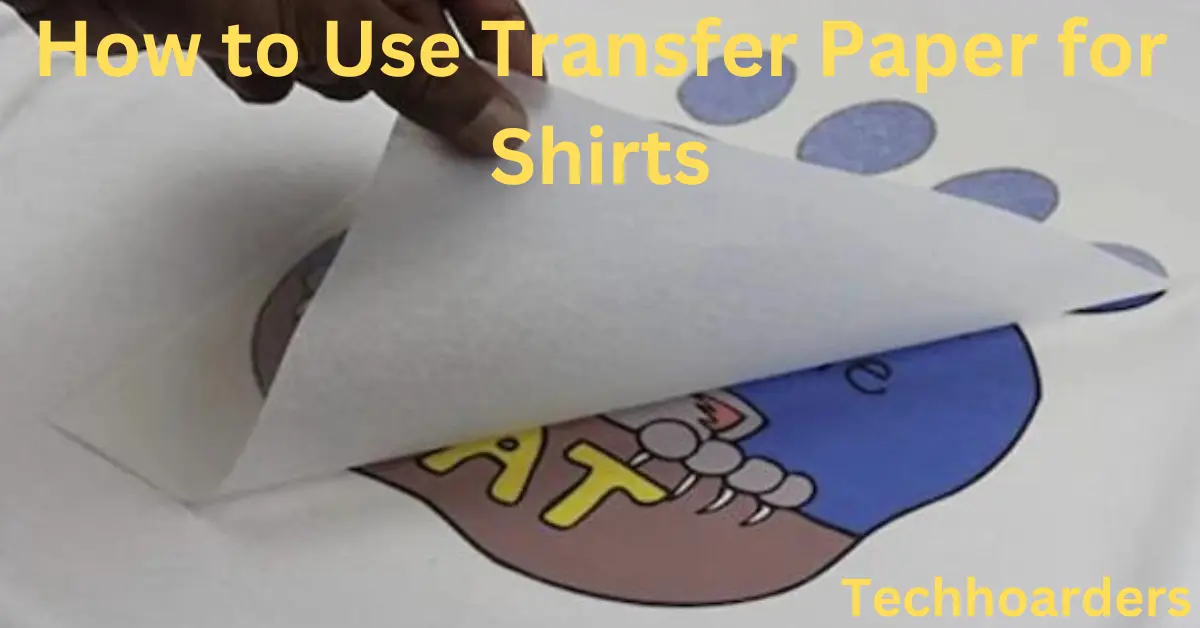
How to Use Transfer Paper for T-Shirts?
Now that you know what type of ink and paper to use, it’s time to learn how to use transfer paper for your next shirt project. Follow these simple steps and create custom shirts in no time!
Reverse Your Artwork
Before you print your design onto the transfer paper, you will need to reverse it. This is because the invention will be transferred onto the shirt in reverse. To reverse your artwork, simply open it in an editing program like Photoshop or Illustrator and select “Flip Horizontal” from the Edit menu.
How to Print on T-Shirt Transfer Paper?
Once your design is reversed, you’re ready to print it onto the transfer paper. Make sure that you are using an inkjet printer and dye-based inks for this project. To print your design, simply load the transfer paper into your printer and print as you would normally.
How to Use Transfer Paper for shirts? Common Mistakes to Avoid
Now that you know how to use transfer paper, there are a few common mistakes that you should avoid. First, make sure that you are using the correct type of ink and paper. Second, be sure to reverse your artwork before printing it onto the transfer paper. And finally, don’t forget to iron your shirt before applying for the transfer!
Final Thoughts
We hope this guide has taught you everything you need to know about how to use transfer paper for shirts. With this knowledge, you’ll be able to create custom shirts for your next event or project. Just remember to choose the right type of ink and paper, reverse your artwork, and iron your shirt before applying for the transfer. Follow these simple steps and you’ll be sure to create a shirt that looks great and lasts for years to come!